Why Your Car Running Board Needs Special Attention
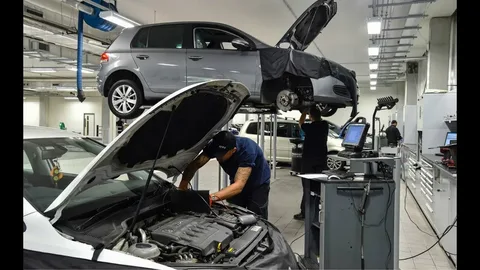
The running board on the right side of your car takes a beating every single day. Passengers step on it, road debris hits it, and the UAE sun fades it faster than almost any other exterior panel. When the paint chips, cracks, or peels, it does not just look bad it opens the metal underneath to rust and corrosion. Getting a proper car right running board paint job is not a luxury; it is a smart investment in protecting your vehicle’s value and appearance. In Ajman, where coastal humidity mixes with intense heat, an untreated or poorly painted running board can deteriorate within months. That is why professional auto body painters in the region use specific primers, topcoats, and sealing techniques designed for the local climate. Whether you drive a Toyota Land Cruiser, a Nissan Patrol, or a family sedan, keeping the right running board painted and protected should be part of your regular vehicle maintenance plan. What Is a Running Board and Where Is the Right One Located? A running board is the horizontal step panel mounted below the doors on both sides of a vehicle. It helps passengers enter and exit the car, especially taller SUVs and pickup trucks. The right running board sits on the passenger side of the vehicle that is the side on the left when you are standing behind the car looking forward. In the UAE and most GCC countries, cars are left-hand drive, so the right side is the co-driver or passenger side. Running boards are usually made of steel, aluminum, or ABS plastic, and they come with either a factory-painted finish or a non-slip rubber overlay. When the painted surface scratches or oxidizes, an automotive surface restoration specialist will assess the damage and recommend either spot repair or a full panel respray. The goal is always seamless color matching so the repaired area blends perfectly with the rest of the vehicle body. Common Causes of Running Board Paint Damage Understanding why running board paint fails helps you prevent future damage. Here are the most frequent culprits that auto body technicians in Ajman see every day: Once you notice any of these signs, scheduling a car right running board paint service promptly prevents small damage from turning into costly rust repair or full panel replacement. Step-by-Step Process for Car Right Running Board Paint in Ajman A professional auto body repair workshop follows a strict process to ensure a durable, factory-quality finish. Here is what the work looks like from start to finish: Step 1 : Damage Assessment and Paint Code Identification The technician first inspects the running board for rust, deep scratches, dents, and peeling paint. They locate the vehicle’s paint code — usually found on a sticker inside the door jamb or under the hood — so they can mix an exact color match. Accurate automotive paint matching is the foundation of any invisible repair. In Ajman garages, computerized spectrophotometer tools are increasingly used to ensure zero color variance between the repaired panel and the original factory finish. Step 2 : Surface Preparation and Rust Treatment Surface preparation is the most critical phase of the entire job. Technicians sand down the damaged area using progressively finer grits, starting with 80-grit to remove old paint and rust, then moving to 180-grit and 400-grit for a smooth base. Any rust pockets are treated with a chemical rust converter before applying epoxy primer. Proper auto body surface prep determines how long the new paint will last skipping this step leads to peeling within weeks. Many car owners in Ajman who try DIY running board painting end up paying more later because they skip proper prep. Step 3 : Priming and Sealing After sanding, the technician applies a high-build primer coat to fill any micro-scratches and create a uniform base. In humid climates like Ajman, an epoxy primer or moisture-barrier sealer is often recommended before the color coat. This step protects against corrosion and ensures the topcoat bonds correctly to the substrate. The primer is allowed to cure fully usually 30 to 60 minutes in a spray booth — before the next stage begins. Step 4 : Color Coat Application The color coat is the visible layer that matches your vehicle’s factory finish. For metallic or pearl colors, multiple thin passes are applied to build depth and achieve the correct flake alignment. Experienced automotive refinishing painters in Ajman blend the new paint into the adjacent panels often the lower door and rocker panel so no visible line exists between old and new paint. This blending technique is what separates a professional vehicle paint touch-up from an amateur repair. Step 5 : Clear Coat and Final Polishing Two to three coats of UV-resistant clear coat are applied over the color to protect it from sun fading and environmental damage. After curing, the panel is wet-sanded with 1500-grit paper and then machine-polished to a mirror finish. The result is a car right running board paint repair that is virtually invisible to the naked eye. A quality clear coat in the Ajman climate should last five to seven years before needing any attention. How Much Does Car Right Running Board Paint Cost in Ajman? Pricing for running board painting in Ajman depends on several factors: the vehicle type, the severity of damage, the paint type (solid, metallic, or pearl), and whether blending into adjacent panels is required. As a general guide for the local market: These are approximate ranges based on typical Ajman auto body workshop pricing. Luxury or specialty vehicles with rare paint codes may cost more due to the additional color-matching time. Always ask your workshop for a written quotation before authorizing any vehicle bodywork repair. Can You Paint a Car Panel by Panel? The Answer Explained Yes, professional auto body technicians paint cars panel by panel all the time. In fact, this is the standard approach in the industry. Each panel door, fender, bumper, running board is treated as an individual unit, and adjacent panels
Why Door Paint Repairs Matter More Than You Think
A single scratch on your car door may seem insignificant, but in the Ajman competitive used-car resale market and demanding climate, even cosmetic bodywork damage can have real consequences. Whether your vehicle has been sideswiped in a parking lot, caught a low wall while reversing, or simply developed oxidation from prolonged sun exposure, restoring the paintwork on your right-rear and front-doors is about far more than aesthetics. Professional door panel painting preserves structural corrosion resistance, maintains your vehicle’s resale value, and ensures factory-level color harmony across panels. In the Ajman, where temperatures can exceed 48°C and UV intensity is among the highest in the world, neglecting damaged paint allows oxidation and metal degradation to accelerate rapidly. This guide covers everything a Ajman car owner needs to know about right rear and front door paint repair, from how the process works and what affects pricing to choosing among partial spot repairs and full panel resprays. Understanding Door Panel Paint Damage: What Are You Actually Dealing With? Before booking any repair, it helps to understand the nature of the damage to your door panels. Automotive paint consists of multiple layers, and the repair approach depends entirely on which layers have been compromised. Clear coat scratches affect only the topmost transparent protective layer. These are the lightest form of damage and can sometimes be corrected with machine polishing alone, without any paint application. Base coat damage reaches the pigmented color layer beneath the clear coat. Here, color-matched paint must be applied. Primer-level damage goes deeper, exposing the primer or even bare metal. This level requires full surface preparation, primer application, base coat, and clear coat, often covering the entire door panel for a uniform finish. Rust or corrosion is the most severe scenario and requires complete removal of the corroded material, rust treatment, panel repair or replacement, and a full paint restoration. In the UAE’s coastal cities such as Ajman, Sharjah salt-air corrosion is a real concern for vehicles that are not regularly maintained. Identifying the correct damage category is the first step any reputable Ajman auto body shop will take before providing an accurate quote. Right-Rear Door vs. Front Door: Are They Repaired Differently? Many vehicle owners ask whether repairing the right rear door panel differs from restoring the front door. The short answer is: the process is technically identical, but certain practical differences affect turnaround time and cost. Panel Size and ComplexityFront doors on most sedans and SUVs are larger than rear doors, meaning more surface area to prepare, prime, and paint. Larger panels require more material and more time in the spray booth, which could slightly increase costs. Access and BlendingThe front right door sits adjacent to the front fender, A-pillar, and rocker panel. A skilled technician must blend paint edges carefully to avoid visible color transitions at the panel boundaries. The right-rear door blends with the B-pillar, C-pillar, and rear quarter panel equally complex work which demands accuracy. Color Matching on Older VehiclesOn vehicles that have been exposed to the UAE sun for several years, original paint naturally fades and changes in tone. Matching a door panel to aged, sun-faded bodywork is a specialist skill. A top-tier garage will use computerized spectrophotometer color-matching technology rather than relying on the paint code alone because a factory-code paint applied to a dulled vehicle will look noticeably mismatched. The Door Paint Repair Process: Step by Step Understanding what happens inside the workshop helps you evaluate whether a garage is doing the job properly or cutting corners. 1. Damage Assessment and Preparation The technician starts with a detailed inspection of the door panel, checking for dents, deep scratches, rust spots, and paint delamination. Any dents are repaired first using PDR (Paintless Dent Repair) where possible, or conventional body filler techniques for larger deformities. 2. Surface Sanding and Feathering The damaged area is progressively sanded with finer grades of sandpaper to create a smooth transition from damaged to undamaged paint. This “feathering” step is critical; poor feathering creates visible ridges under the new paint. 3. Masking and Protection Adjacent panels, glass, trim, and rubber seals are carefully masked to prevent overspray. This step is deceptively important: overspray on windows or trim can require additional correction work. 4. Primer Application A suitable primer is applied to the prepared surface, providing adhesion for the color coat and a uniform base. In Ajman conditions, moisture-resistant primers are preferred to guard against humidity-related adhesion failure. 5. Color Coat Application The base coat, matched precisely to your vehicle’s color code and adjusted for any natural fading, is applied in multiple thin, even passes inside a temperature-controlled spray booth. Booths in quality Ajman garages are dust-free and ventilated to prevent contamination of the wet paint. 6. Clear Coat and Gloss Finish A UV-resistant clear coat is applied over the color coat. In the Ajman, UV-stable clear coats are not optional; standard clear coats can oxidize and yellow within months under intense desert sunlight. 7. Polishing and Blending Once cured, the panel is machine-polished to eliminate any minor orange-peel texture and then blended with adjacent panels. A final inspection under panel lighting confirms color and gloss uniformity. Door Paint Cost in Ajman: What to Expect in 2025 Pricing for right-rear and front-door paint repair in the Ajman varies considerably based on damage severity, vehicle type, and the workshop’s quality tier. Scratch touch-up (clear coat only) AED 150 – 400 Spot repair (small area, base + clear) AED 350 – 700 Single door panel respray AED 800 – 2,500 Door panel respray + dent repair AED 1,200 – 3,500 Full door replacement + paint AED 2,500 – 6,000+ Luxury vehicles, SUVs, and cars with complex paint finishes (metallic, pearl, matte, or tri-coat) typically sit at the higher end of their respective ranges. Budget workshops advertising AED 199 door resprays generally use lower-quality paints without UV protection a false economy in a market where the sun is your car’s worst enemy. Factors That Affect the Final Price of Door Paint in the
Everything You Need to Know About Belt Maintenance and Noise Prevention
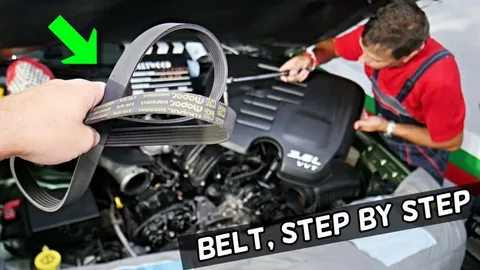
The drive belt is one of the most important yet often overlooked components of a vehicle’s engine system. Responsible for powering essential accessories such as the alternator, air conditioning compressor, water pump, and power steering pump, the drive belt plays a crucial role in ensuring smooth vehicle operation. When the drive belt becomes worn, dry, or damaged, drivers may experience squealing noises, reduced performance, or even unexpected breakdowns. Many vehicle owners search for information about car drive belt lubrication because they notice unusual belt noises or want to extend the lifespan of their vehicle’s belt system. While proper maintenance is essential, understanding when and how lubrication should be used is equally important. In this comprehensive guide, we’ll cover everything you need to know about car drive belt lubrication, including its purpose, benefits, warning signs, maintenance tips, and best practices for keeping your vehicle running smoothly. What Is a Car Drive Belt? A car drive belt, often referred to as a serpentine belt or accessory belt, is a reinforced rubber belt that transfers power from the engine’s crankshaft to various engine accessories. The drive belt helps operate: Without a properly functioning drive belt, many critical vehicle systems would stop working, potentially leaving you stranded on the road. Why Is Drive Belt Maintenance Important? The drive belt is constantly exposed to heat, friction, moisture, dirt, and engine vibrations. Over time, these factors can cause the belt to wear out, crack, stretch, or lose efficiency. Regular maintenance offers several benefits: Prevents Unexpected Breakdowns A failed drive belt can instantly disable essential engine accessories, causing serious drivability issues. Improves Engine Efficiency A properly maintained belt ensures smooth operation of engine-driven components. Reduces Repair Costs Routine inspections and maintenance can help identify issues before they become expensive repairs. Extends Component Lifespan Proper belt maintenance reduces stress on pulleys, bearings, tensioners, and accessory systems. Enhances Driving Comfort A healthy belt system helps maintain reliable power steering and air conditioning performance. Understanding Car Drive Belt Lubrication When drivers hear a squealing or chirping noise from the engine compartment, many assume the belt needs lubrication. However, modern drive belts are designed differently than older belt systems. Most modern serpentine belts do not require traditional lubrication with oils or grease. In fact, applying oil-based lubricants directly to the belt can often cause more harm than good. However, certain belt conditioning products and maintenance procedures may be used in specific situations to address minor noise issues temporarily. Common Causes of Drive Belt Noise Before considering lubrication, it is important to identify the root cause of belt noise. Worn Belt Surface Over time, belts lose flexibility and develop a glazed surface that can cause slipping. Improper Belt Tension A loose belt may slip against pulleys and create squealing sounds. Misaligned Pulleys Pulley alignment issues can cause uneven belt wear and noise. Dirt and Debris Dust, oil contamination, and road grime can affect belt performance. Damaged Belt Tensioner A faulty tensioner may fail to maintain proper belt tension. Moisture Exposure Rain, humidity, or coolant leaks can temporarily affect belt traction. Signs Your Drive Belt Needs Attention Recognizing warning signs early can prevent more serious problems. Squealing Noise During Startup A high-pitched squeal when starting the engine often indicates belt wear or tension issues. Visible Cracks Cracks on the belt surface suggest aging and deterioration. Frayed Edges Fraying indicates excessive wear or pulley misalignment. Glazing A shiny belt surface can reduce traction and increase slipping. Loss of Accessory Function Weak power steering or charging issues may indicate belt-related problems. Dashboard Warning Lights Alternator-related warning lights may appear if the belt is slipping. Can You Lubricate a Drive Belt? This is one of the most frequently asked questions by vehicle owners. The answer depends on the type of belt and the specific issue being addressed. Why Traditional Lubrication Is Not Recommended Applying oil, grease, or penetrating lubricants directly to a modern serpentine belt can: Modern belts are engineered to operate without oil-based lubrication. When Belt Conditioning Products May Help Some technicians use specialized belt dressing products designed specifically for automotive belts. These products may: However, belt dressing should not be considered a permanent solution to underlying mechanical issues. Benefits of Proper Drive Belt Care Instead of focusing solely on lubrication, proper maintenance delivers greater long-term benefits. Longer Belt Life Routine inspections help identify wear before failure occurs. Improved Engine Performance Efficient belt operation supports accessory performance. Reduced Noise Addressing tension and alignment issues eliminates most belt-related sounds. Better Fuel Economy A properly functioning accessory drive system reduces engine strain. Increased Reliability Well-maintained belts are less likely to fail unexpectedly. How to Inspect a Drive Belt Regular inspections can help detect problems early. Step 1: Turn Off the Engine Always inspect belts with the engine off and cool. Step 2: Check Belt Condition Look for: Step 3: Inspect Pulleys Ensure pulleys rotate smoothly without wobbling. Step 4: Check Belt Tension The belt should feel firm and properly tensioned. Step 5: Listen for Unusual Sounds Start the engine and listen for squealing, chirping, or grinding noises. How Often Should a Drive Belt Be Replaced? Replacement intervals vary depending on vehicle type and driving conditions. General guidelines suggest: Always follow your vehicle manufacturer’s recommendations. DIY Drive Belt Maintenance Tips Vehicle owners can perform several preventive maintenance tasks. Keep the Engine Bay Clean Removing dirt and debris helps protect belt components. Fix Fluid Leaks Promptly Oil and coolant leaks can damage belt materials. Monitor Belt Condition Inspect belts during routine oil changes. Replace Worn Components Faulty tensioners and pulleys should be replaced immediately. Follow Maintenance Schedules Routine maintenance helps prevent premature wear. Professional Drive Belt Service While basic inspections can be performed at home, professional service provides additional benefits. Technicians can: Professional inspections help ensure long-term reliability. Cost of Drive Belt Maintenance and Replacement The cost depends on vehicle type and labor rates. Drive Belt Inspection Typically ranges from: $20 to $80 Drive Belt Replacement Most vehicles cost between: $80 and $300 Luxury vehicles and complex engine
Car Radiator Flush and Clean: The Ultimate Guide for Every Vehicle Owner
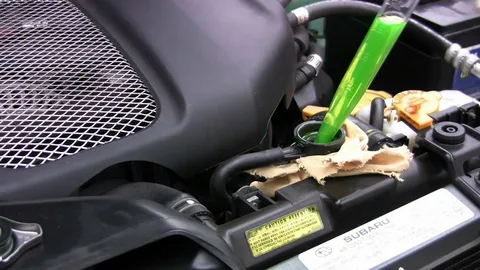
A car radiator flush and clean is one of the most important maintenance procedures that vehicle owners often overlook. The radiator plays a critical role in regulating engine temperature, preventing overheating, and ensuring optimal engine performance. Over time, rust, scale deposits, dirt, and contaminated coolant can accumulate inside the cooling system, reducing efficiency and potentially causing costly engine damage. Whether you drive a compact sedan, SUV, pickup truck, or luxury vehicle, understanding how to flush and clean your radiator can save you money on repairs while improving the overall health of your engine. In this comprehensive guide, we’ll explain everything you need to know about radiator flushing, including benefits, signs your radiator needs cleaning, step-by-step instructions, costs, and frequently asked questions. What Is a Car Radiator Flush and Clean? A radiator flush and clean is the process of removing old coolant, contaminants, rust particles, and debris from your vehicle’s cooling system. The procedure involves draining the existing coolant, flushing the system with water or a specialized radiator flush solution, and refilling it with fresh coolant. Unlike a simple coolant top-up, a complete radiator flush removes harmful deposits that can restrict coolant flow and reduce heat transfer efficiency. The cooling system consists of several components: A thorough radiator cleaning helps maintain all these components by ensuring clean coolant circulates freely throughout the system. Why Is a Radiator Flush Important? Many drivers underestimate the importance of cooling system maintenance. Fresh coolant not only prevents freezing and overheating but also contains additives that protect against corrosion and scale buildup. Key Benefits of a Car Radiator Flush and Clean 1. Prevents Engine Overheating Dirty coolant cannot efficiently transfer heat away from the engine. A clean radiator allows coolant to circulate properly and maintain optimal operating temperatures. 2. Improves Cooling Efficiency Removing sludge and debris restores the radiator’s ability to dissipate heat effectively. 3. Extends Engine Life Consistent operating temperatures reduce stress on engine components, helping them last longer. 4. Prevents Corrosion Old coolant loses its anti-corrosion properties over time, leading to rust formation inside the cooling system. 5. Enhances Fuel Efficiency An engine running at proper temperature generally performs more efficiently, which may contribute to improved fuel economy. 6. Reduces Repair Costs Regular radiator maintenance helps prevent expensive repairs such as: Signs Your Car Needs a Radiator Flush and Clean Several warning signs indicate your cooling system requires attention. Engine Overheating If your temperature gauge consistently rises above normal, contaminated coolant may be restricting heat transfer. Discolored Coolant Healthy coolant is usually bright green, orange, yellow, pink, or blue depending on the type. Brown or rusty coolant suggests contamination. Sweet Smell from the Engine Bay Coolant leaks often produce a sweet odor around the vehicle. Visible Rust or Debris Inspect the radiator cap area. Rust particles or sludge indicate internal contamination. Heater Performance Issues A clogged cooling system can affect cabin heating performance. Coolant Warning Light Many modern vehicles include cooling system warning indicators. Frequent Coolant Top-Ups If coolant levels drop frequently, there may be leaks or system contamination. How Often Should You Flush Your Radiator? The recommended interval depends on the manufacturer and coolant type. General Guidelines Always consult your vehicle owner’s manual for exact service intervals. Tools and Materials Needed Before starting a radiator flush and clean, gather the following: Using distilled water is highly recommended because it contains fewer minerals that can cause scale buildup. Step-by-Step Guide to Car Radiator Flush and Clean Step 1: Let the Engine Cool Never open the radiator cap on a hot engine. Wait until the vehicle has cooled completely. Step 2: Locate the Radiator Drain Valve Position a drain pan underneath the radiator and locate the drain valve or petcock. Step 3: Drain Old Coolant Open the drain valve carefully and allow all coolant to flow into the drain pan. Step 4: Close the Drain Valve Once drained, securely close the valve before proceeding. Step 5: Add Radiator Flush Solution Pour the radiator cleaning solution into the radiator according to manufacturer instructions. Step 6: Fill with Water Add distilled water until the radiator reaches the proper level. Step 7: Run the Engine Start the vehicle and allow it to reach operating temperature. This circulates the cleaning solution through the cooling system. Step 8: Shut Off and Cool Down Turn off the engine and allow it to cool completely. Step 9: Drain Again Drain the cleaning solution and contaminants from the radiator. Step 10: Repeat if Necessary Heavily contaminated systems may require multiple flushes. Step 11: Refill with Fresh Coolant Add the recommended coolant mixture for your vehicle. Step 12: Bleed Air from the System Some vehicles require bleeding procedures to remove trapped air pockets. Step 13: Check for Leaks Inspect all hoses, fittings, and connections for leaks. Common Causes of Radiator Contamination Understanding what causes contamination can help prevent future problems. Rust Formation Metal components inside the cooling system can rust when coolant additives degrade. Mineral Deposits Using hard water instead of distilled water can cause scale buildup. Coolant Breakdown Old coolant eventually loses its protective properties. Oil Contamination A damaged head gasket can allow oil to mix with coolant. External Debris Dirt, leaves, and insects can block airflow through radiator fins. DIY vs Professional Radiator Flush DIY Radiator Flush Advantages: Disadvantages: Professional Service Advantages: Disadvantages: Many repair shops use pressurized flushing equipment that can remove stubborn contaminants more effectively than basic DIY methods. How Much Does a Radiator Flush Cost? Costs vary depending on vehicle type and location. DIY Cost Typical range: Estimated total: $40–$100 Professional Cost Most repair facilities charge between: $80–$250 Luxury and heavy-duty vehicles may cost more. Best Practices for Maintaining a Clean Radiator Preventive maintenance is easier and cheaper than repairs. Inspect Coolant Regularly Check coolant color and level monthly. Use Manufacturer-Approved Coolant Always use coolant specified by your vehicle manufacturer. Keep Radiator Fins Clean Remove dirt and debris from the radiator’s exterior. Check Hoses Frequently Replace cracked or deteriorated hoses promptly. Monitor Engine Temperature Pay attention to temperature